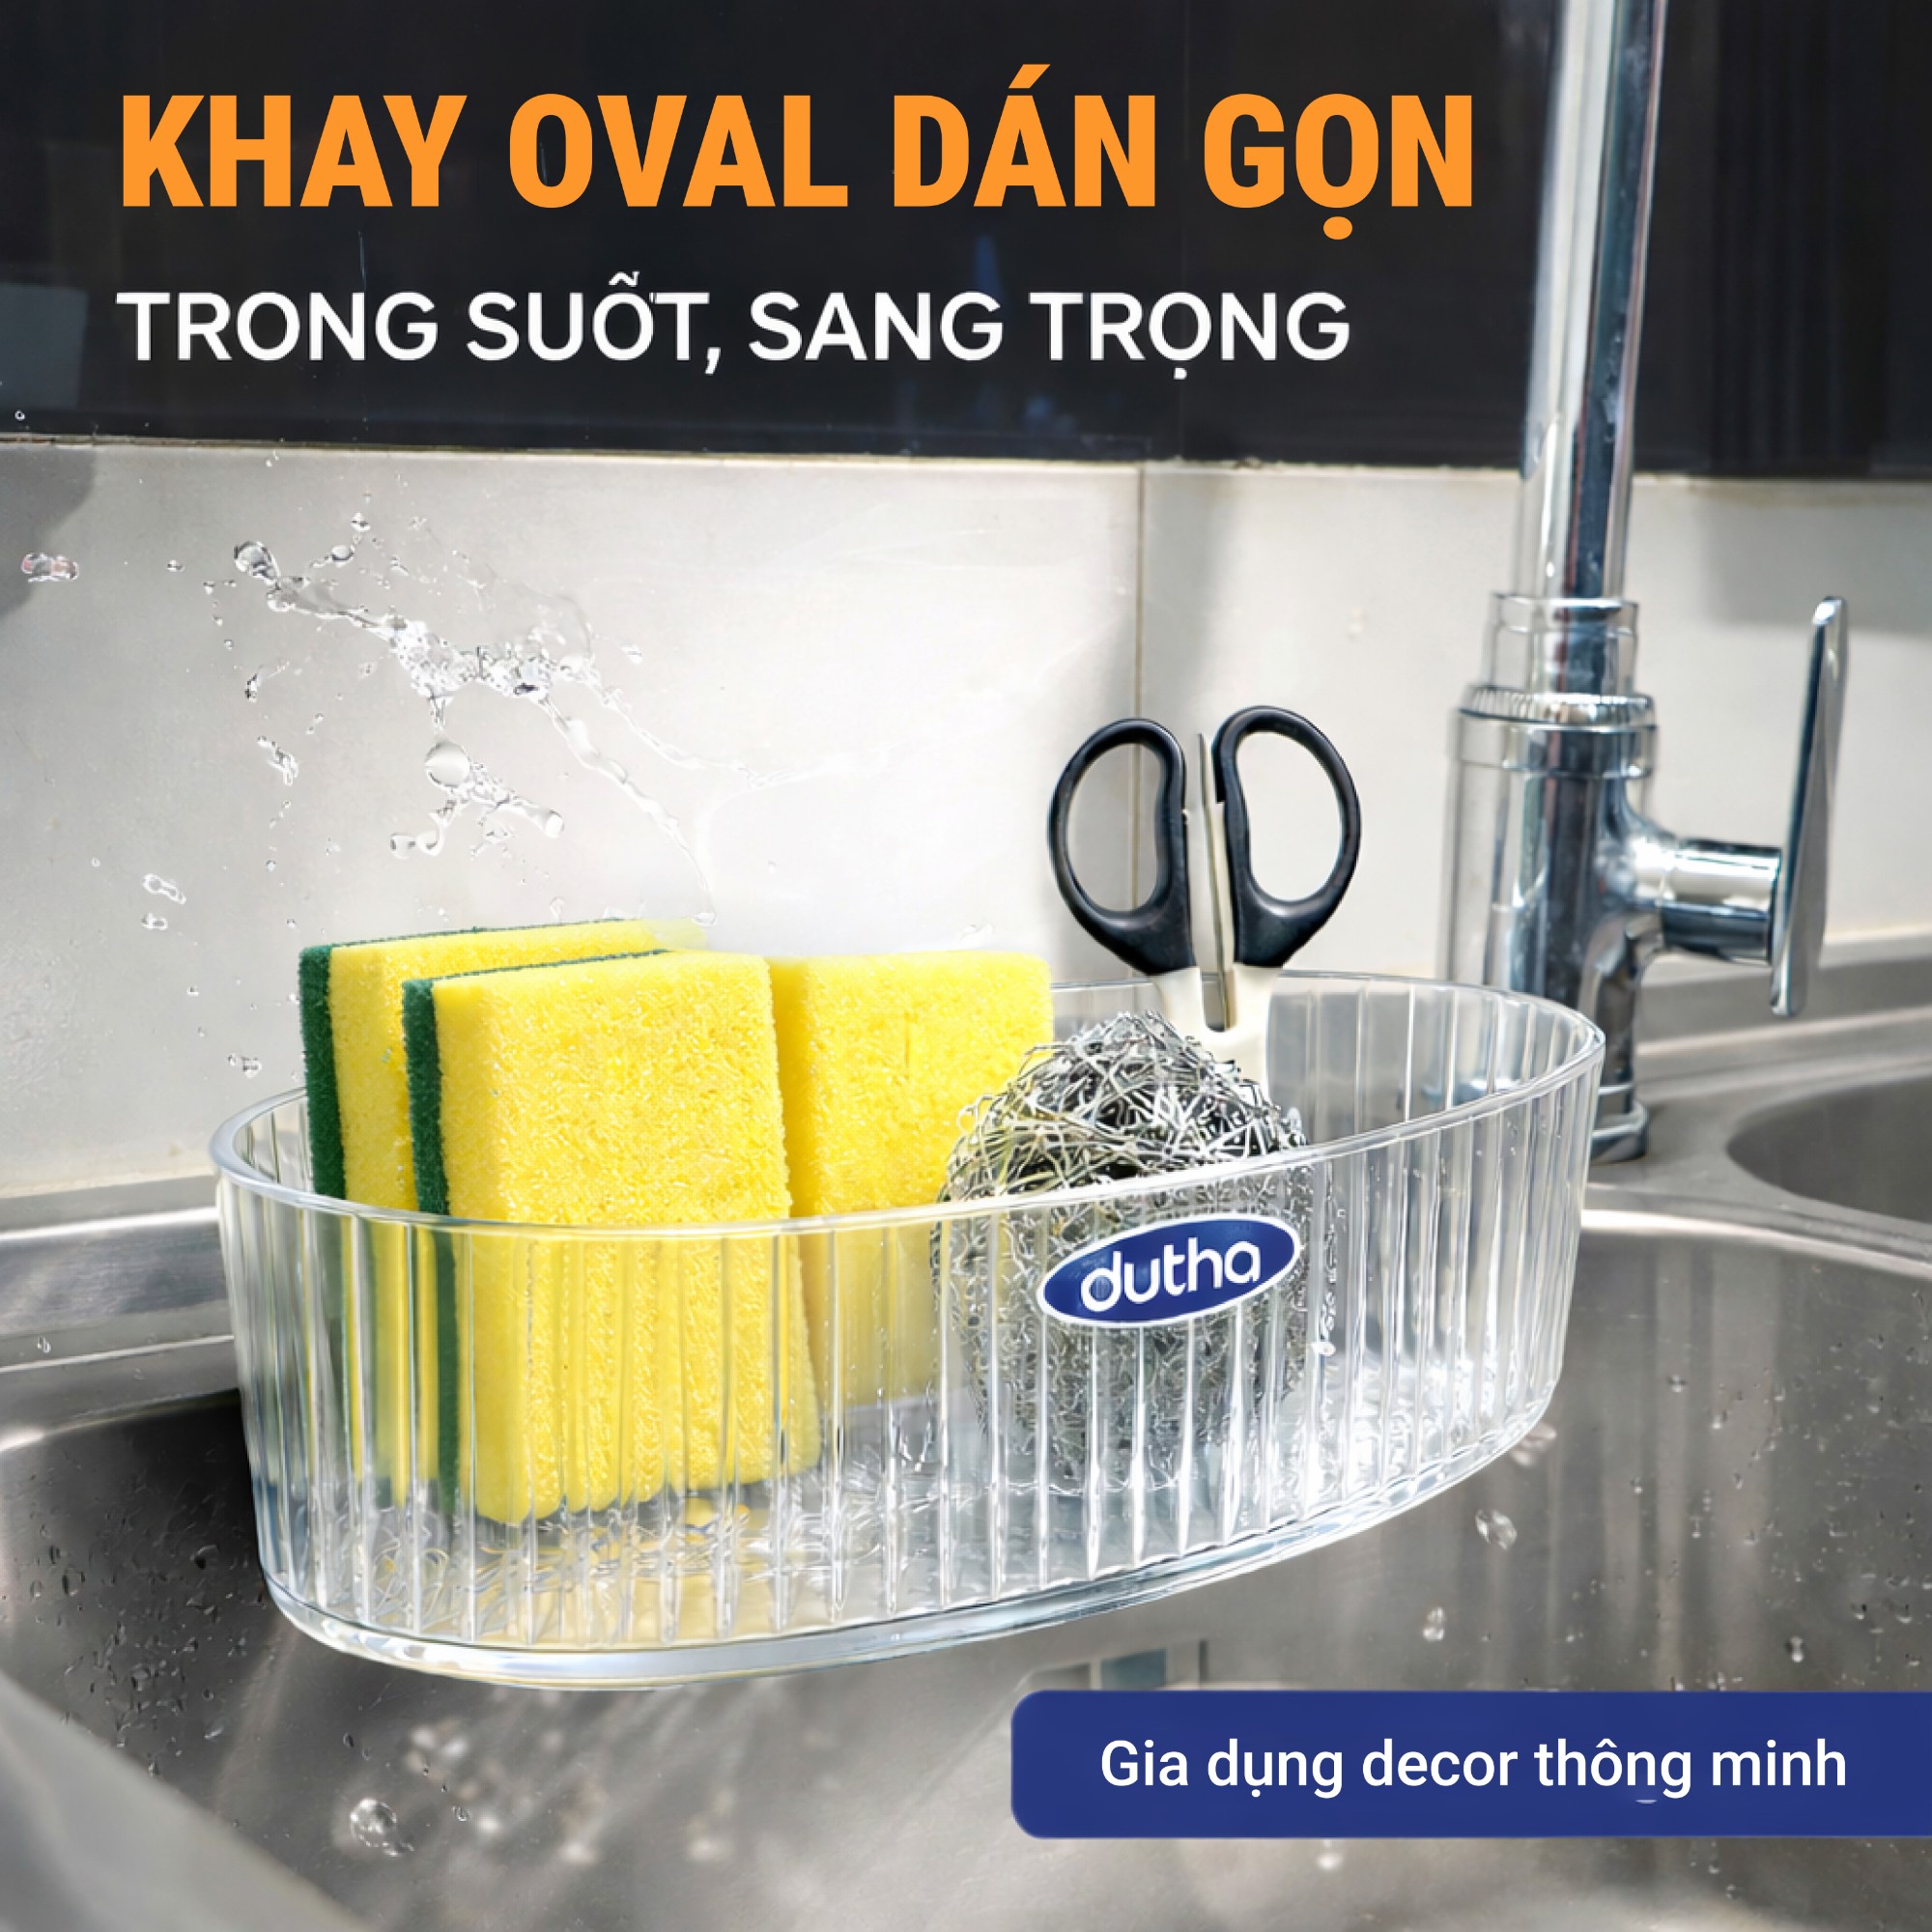
GD1 Oval Adhesive Tray
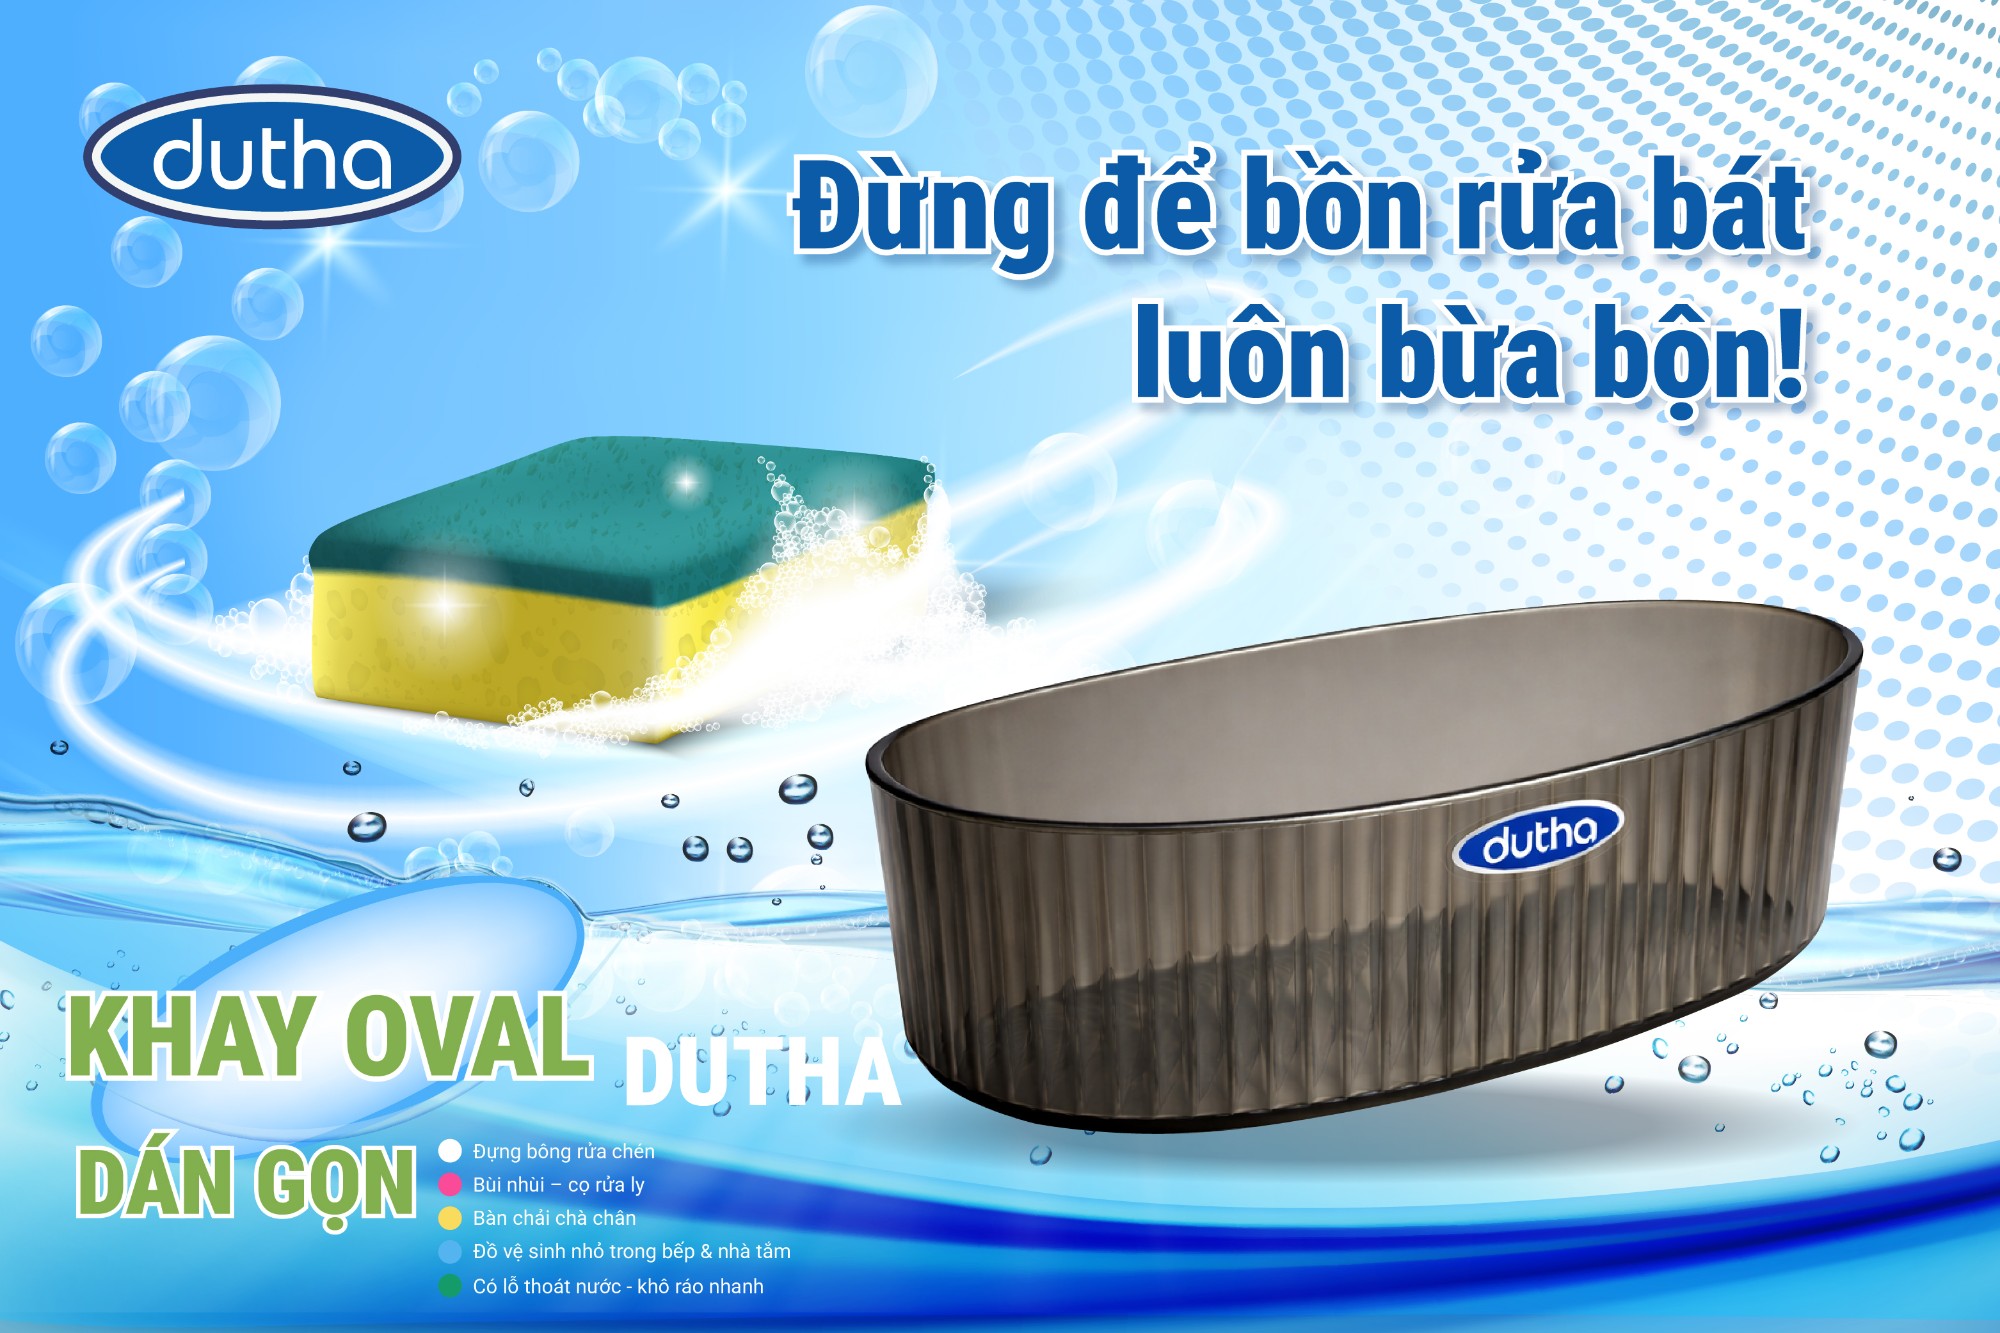
Dutha Oval Adhesive Tray – A Neat and Tidy Solution for Storing Dishwashing Sponges, No Drilling Required.
The sink area is always the messiest place in the kitchen.
Wet dishwashing sponges.
Scouring pads scattered everywhere.
Brushes with no designated place.
It may seem like a small thing, but it's very unsightly.
The Dutha Oval Adhesive Tray is specially designed to neatly hold:
- Dishwash sponges
- Scalpels
- Brushes
- Small items
Keeping only what needs to be kept tidy.
Sticks securely – No drilling required – No damage to walls.
- Sticks directly onto kitchen tiles.
- No drilling required.
- No mess.
- Suitable for rental properties.
Simply clean the surface, press the adhesive down for 30 seconds, and wait a few hours before use.
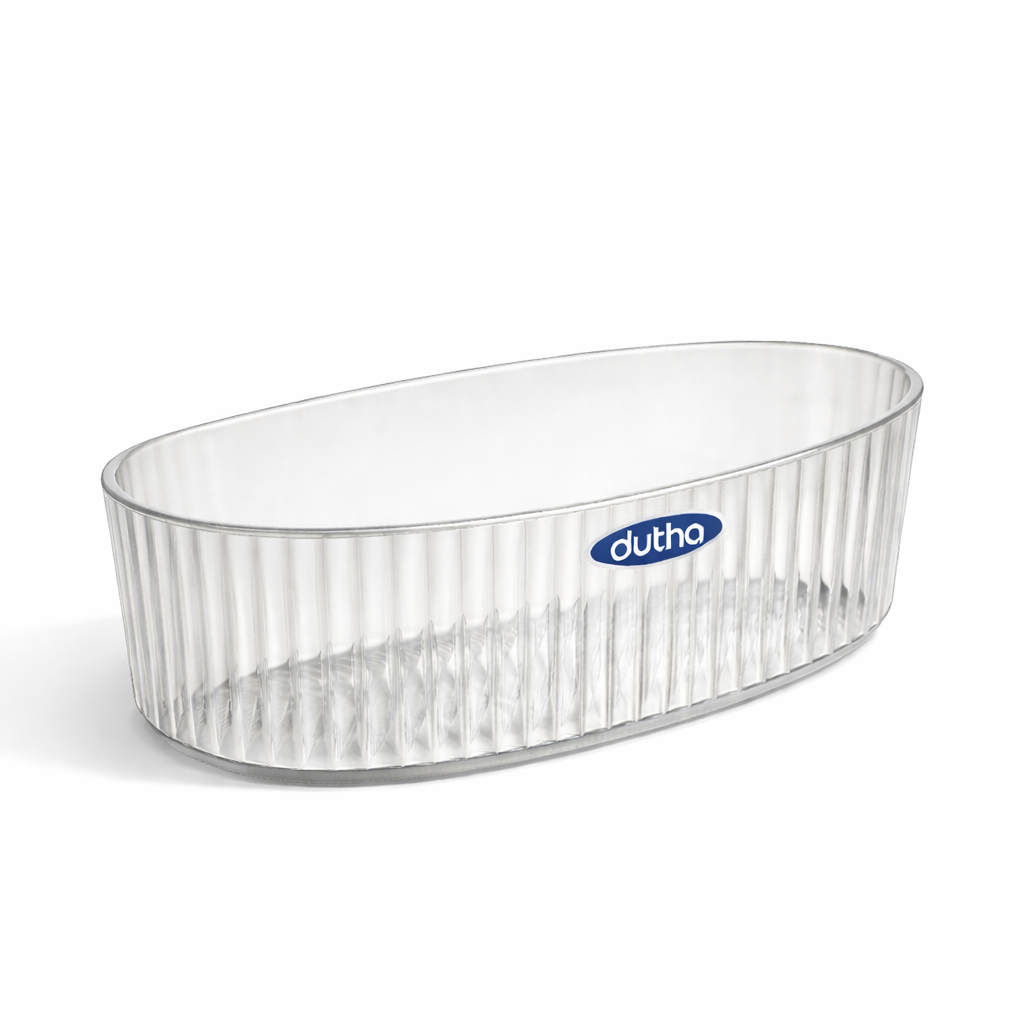
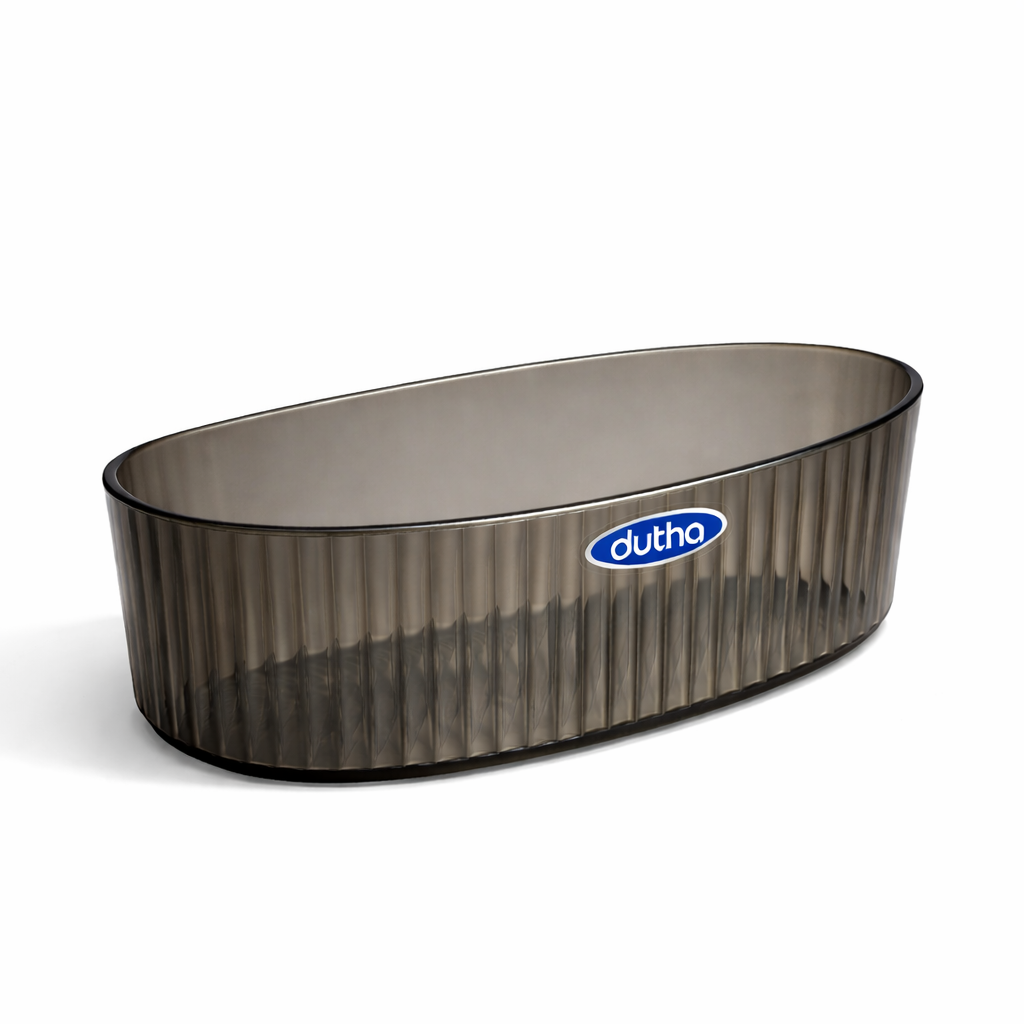
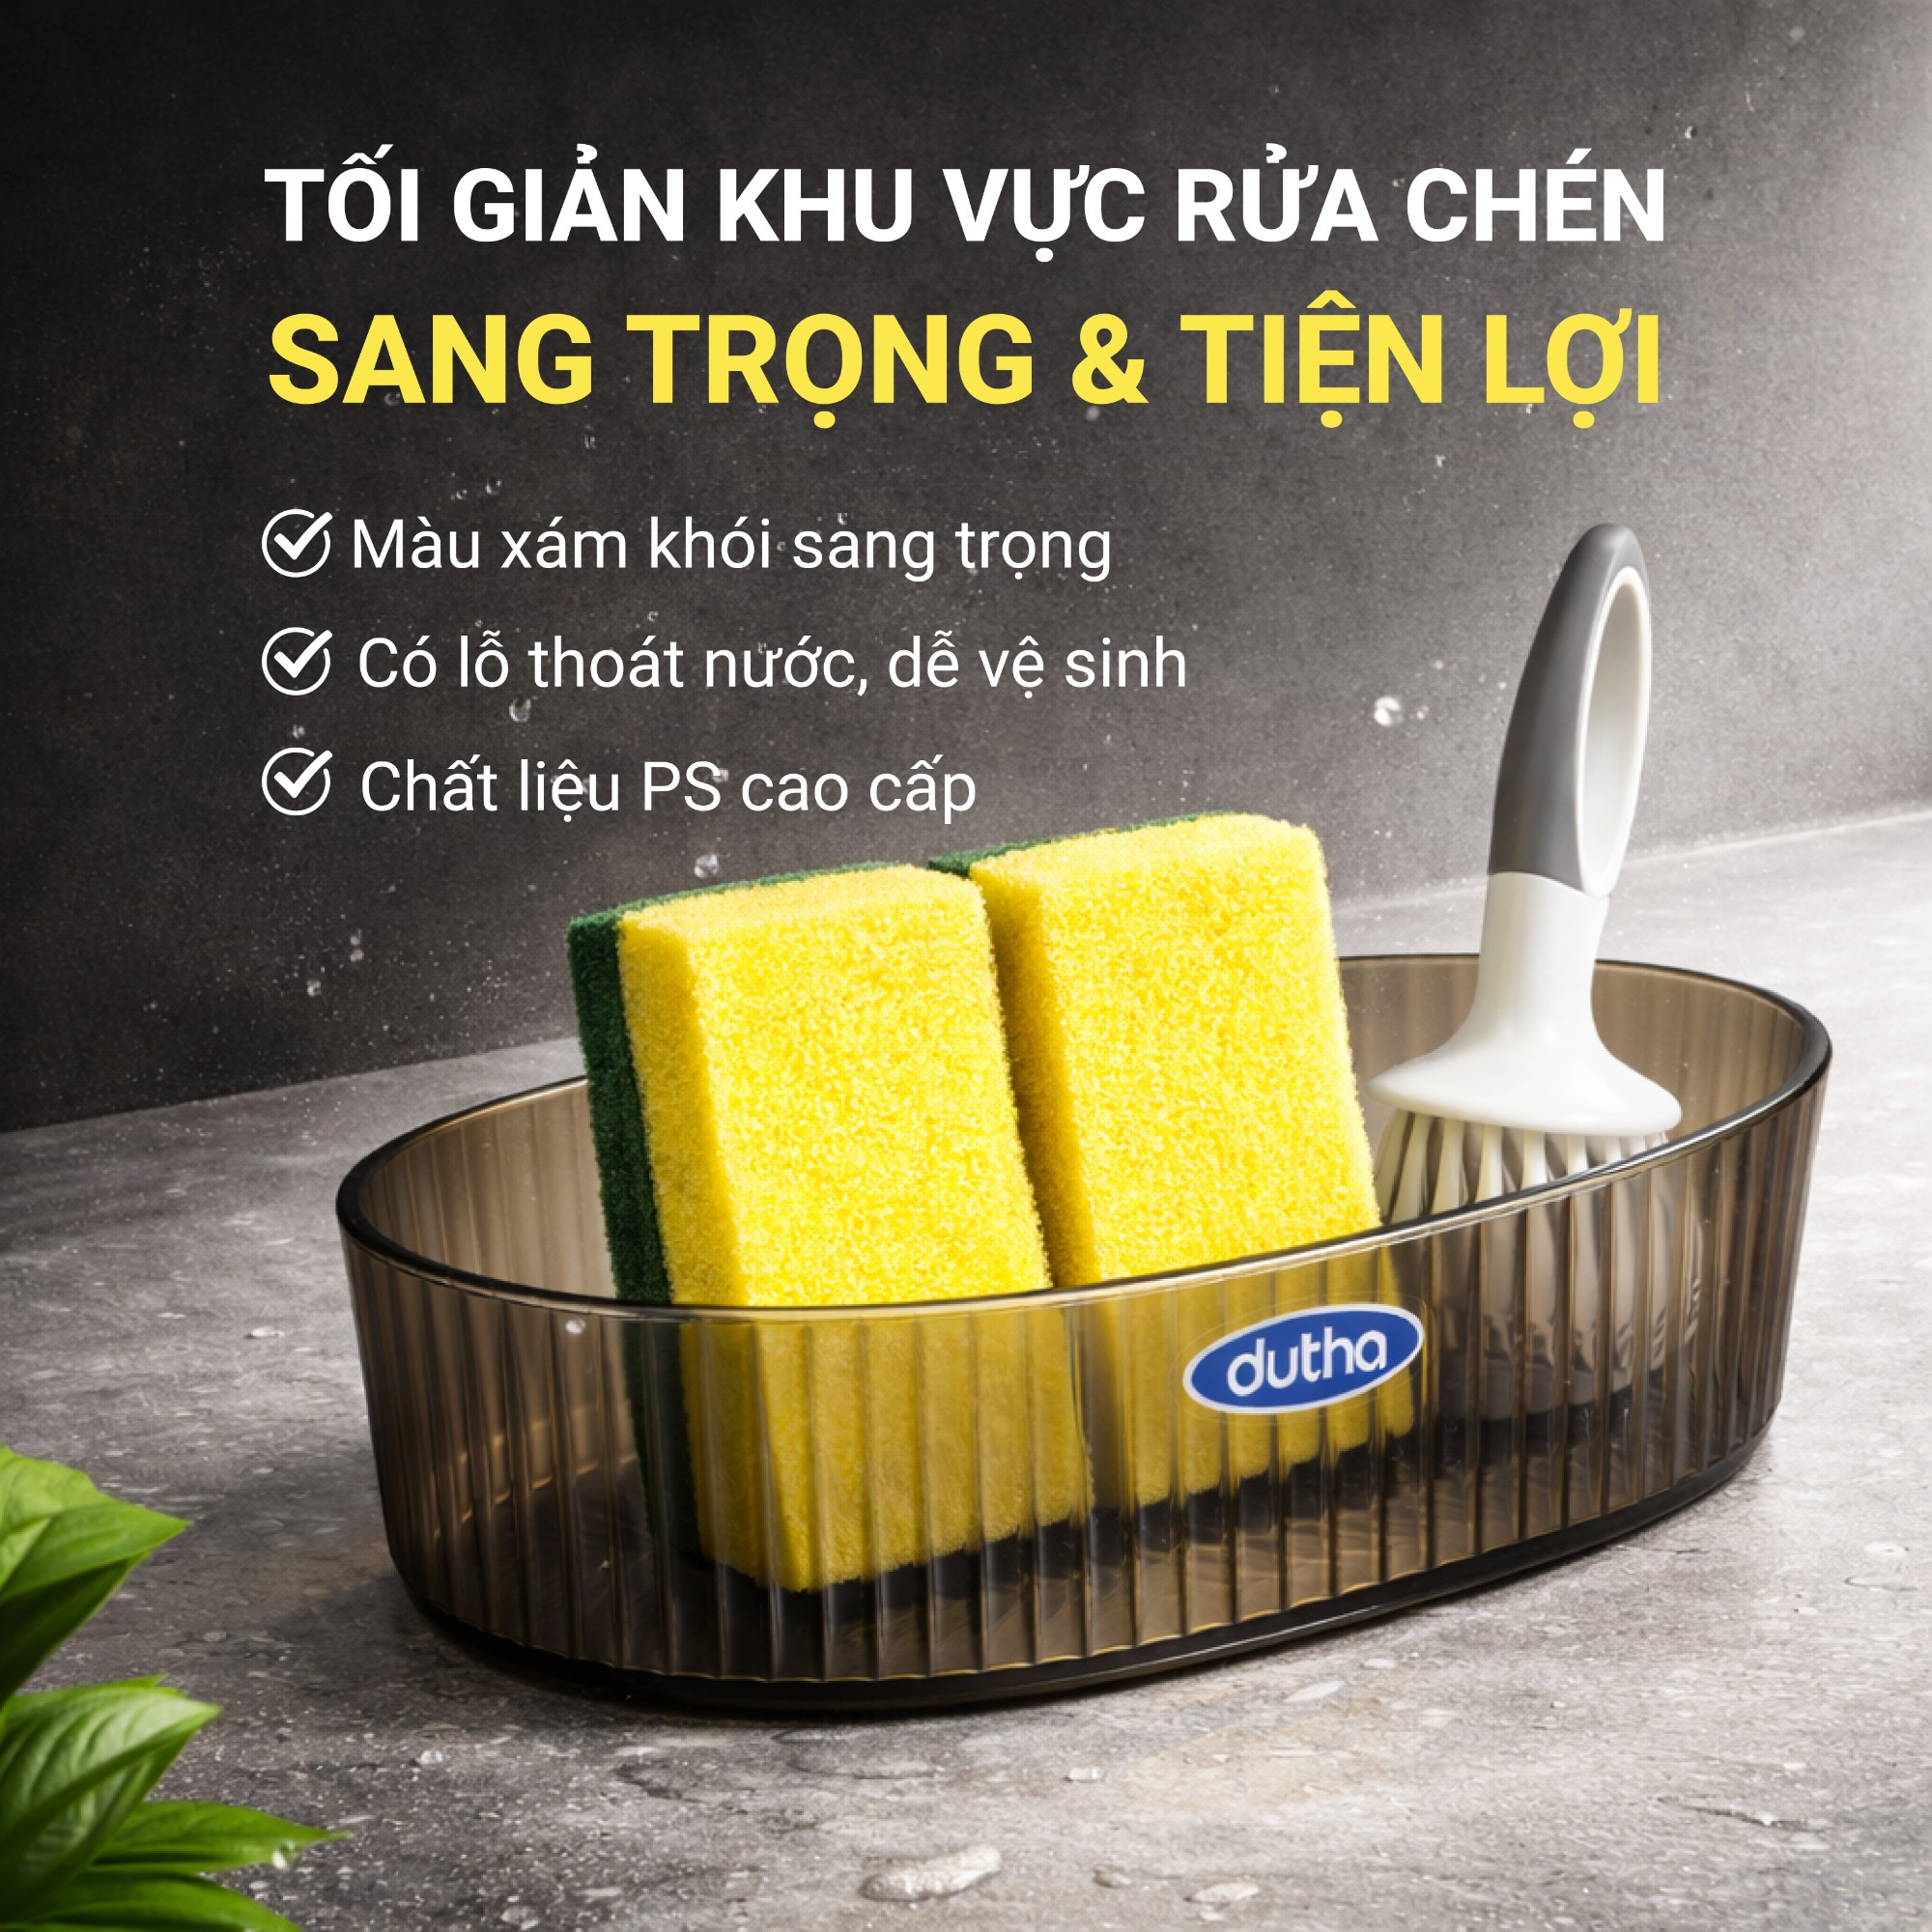
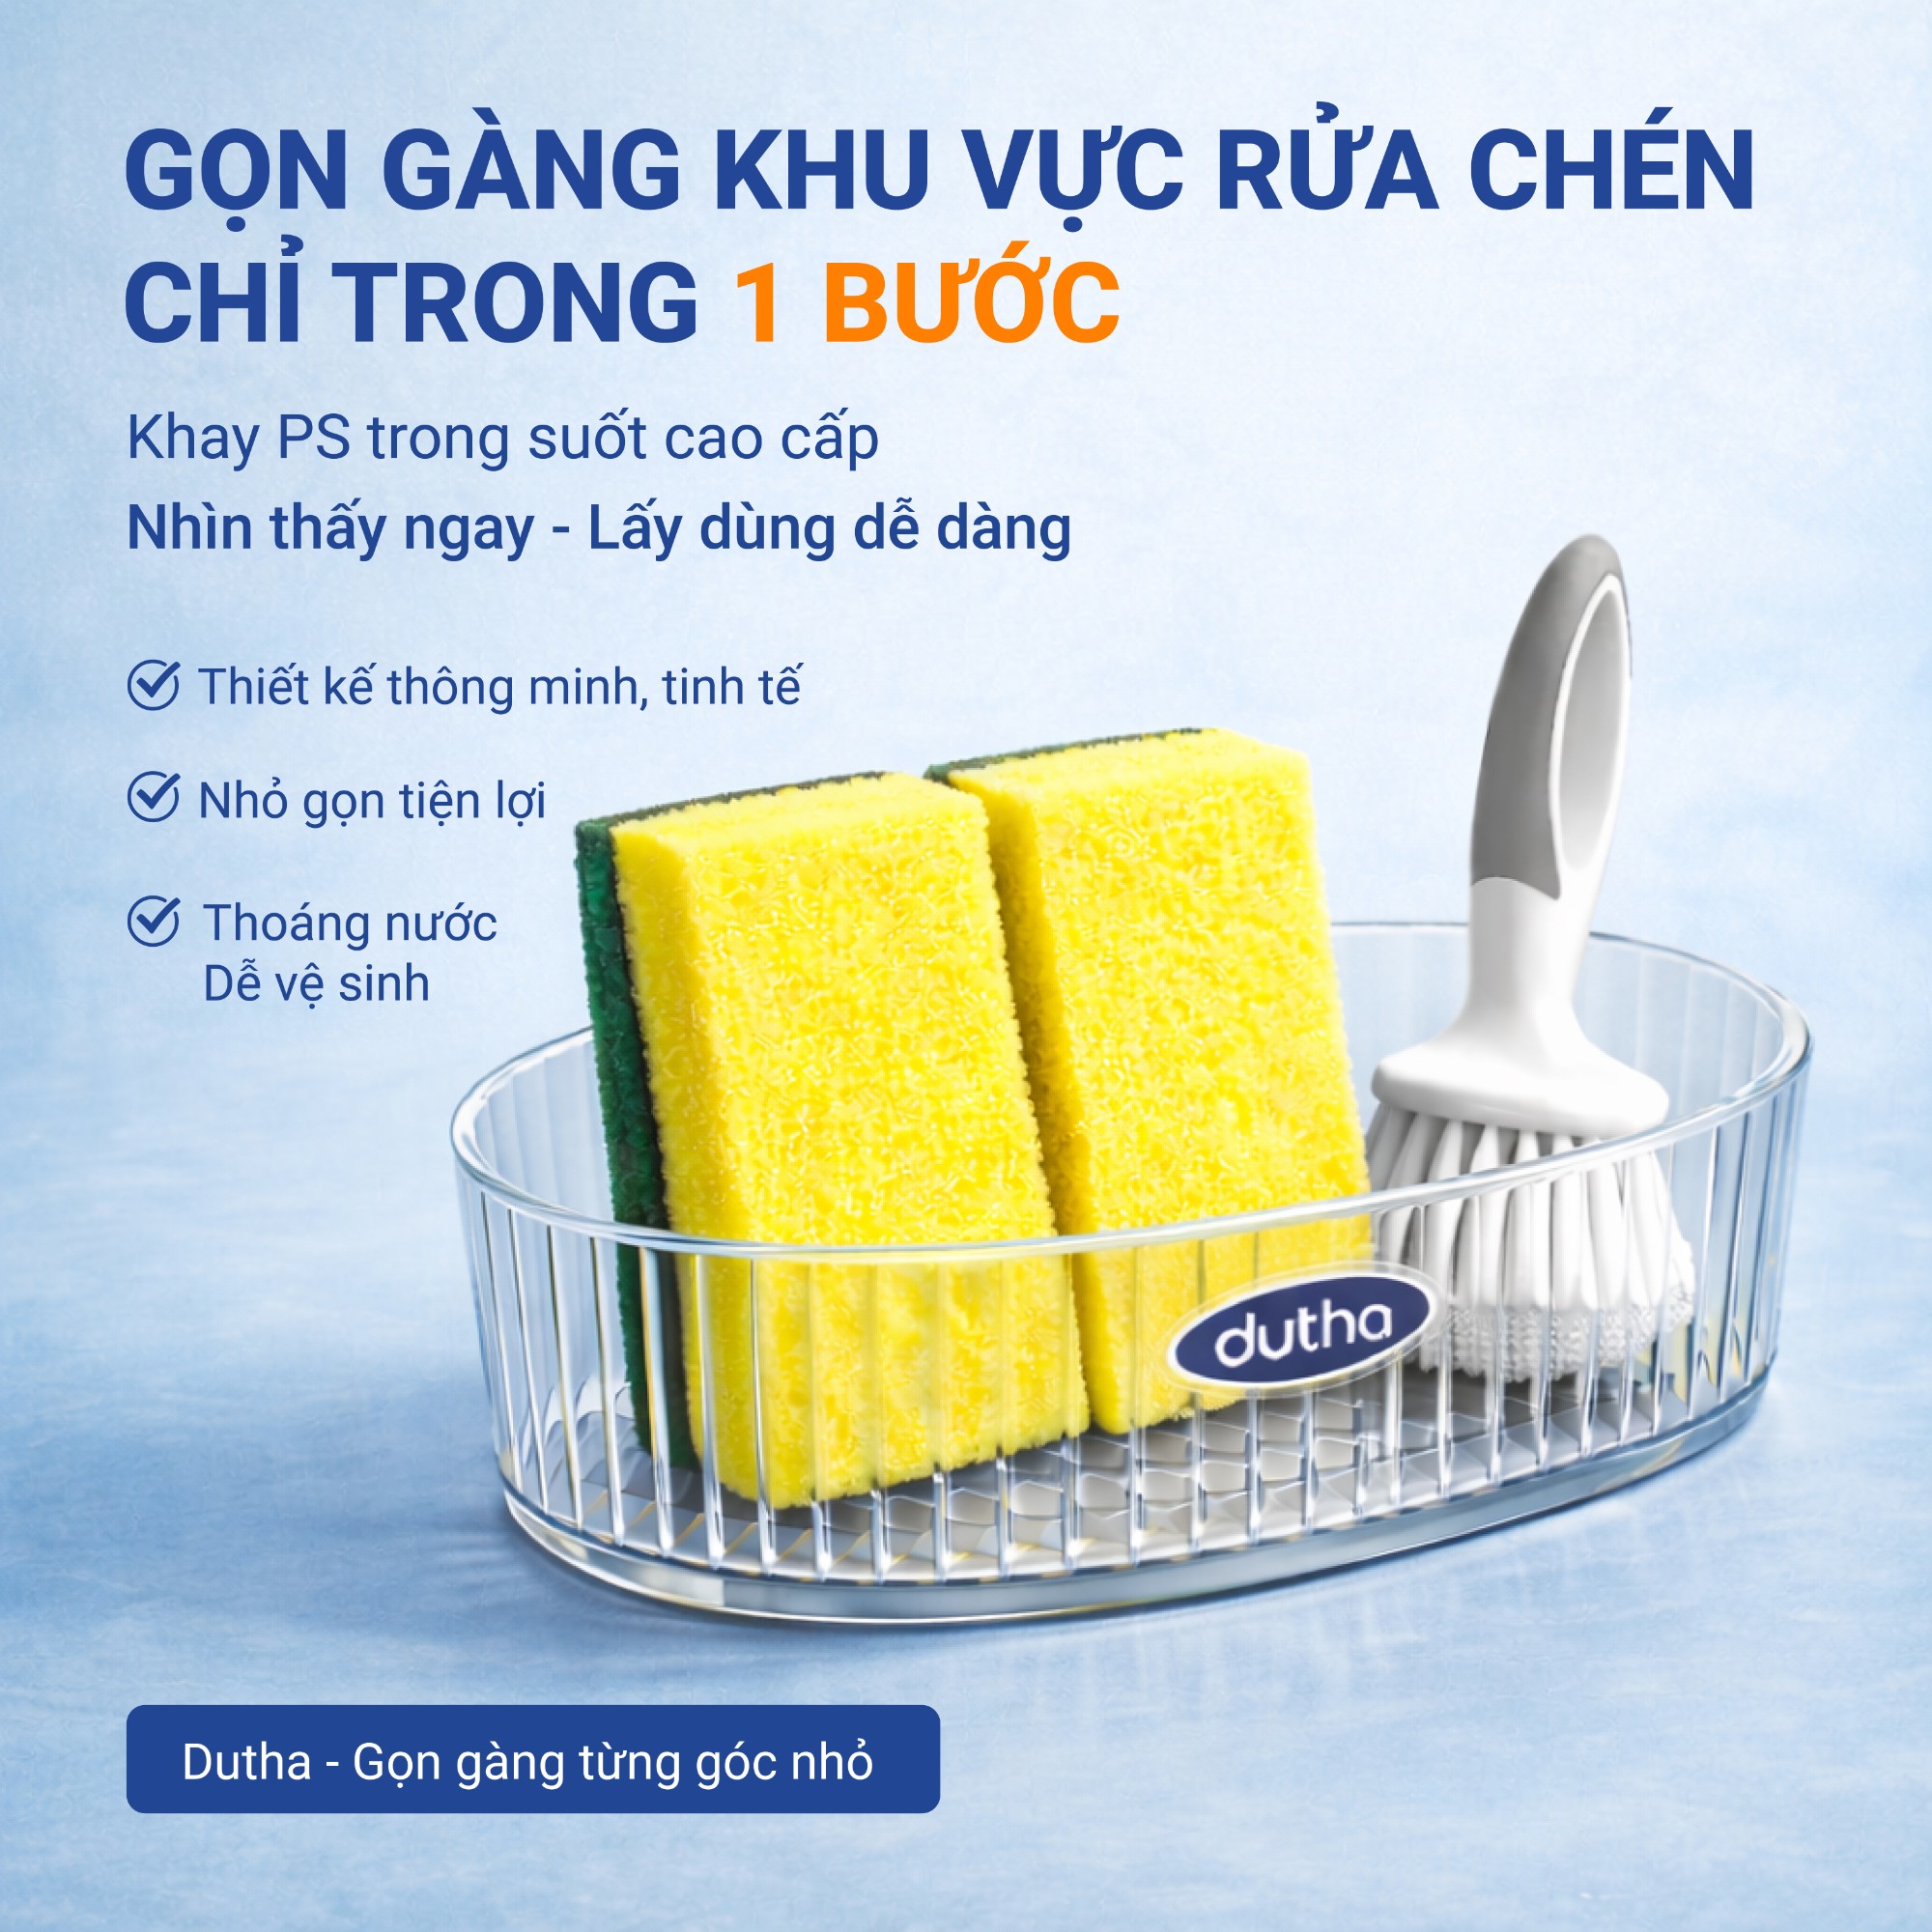
Oval design – Drains quickly, stays dry.
The tray features:
- A soft, curved shape
- Clear drainage grooves on the front
- An open design for quick drying
No more water pooling on dishwashing sponges.
No more steel wool sitting on the edge of the sink.
A cleaner kitchen simply because you keep things organized.

Why should you use a separate tray for your kitchen sink?
✔ Avoid bacteria caused by dampness
✔ Do not place items directly on the countertop
✔ Develop a habit of tidiness every day
✔ Make your kitchen look neater
A small tray can change the feel of the entire kitchen.
Who is it suitable for?
- Apartments, dormitories
- Young families wanting to optimize space
- People who love minimalist style
- Homestay owners needing a clean and tidy kitchen
Dutha – More than just household goods
The oval-shaped tray isn't meant to hold a lot of things.
It's meant to hold just the things that most easily clutter the kitchen.
Keeps a small corner tidy.
Keeps the whole space peaceful.
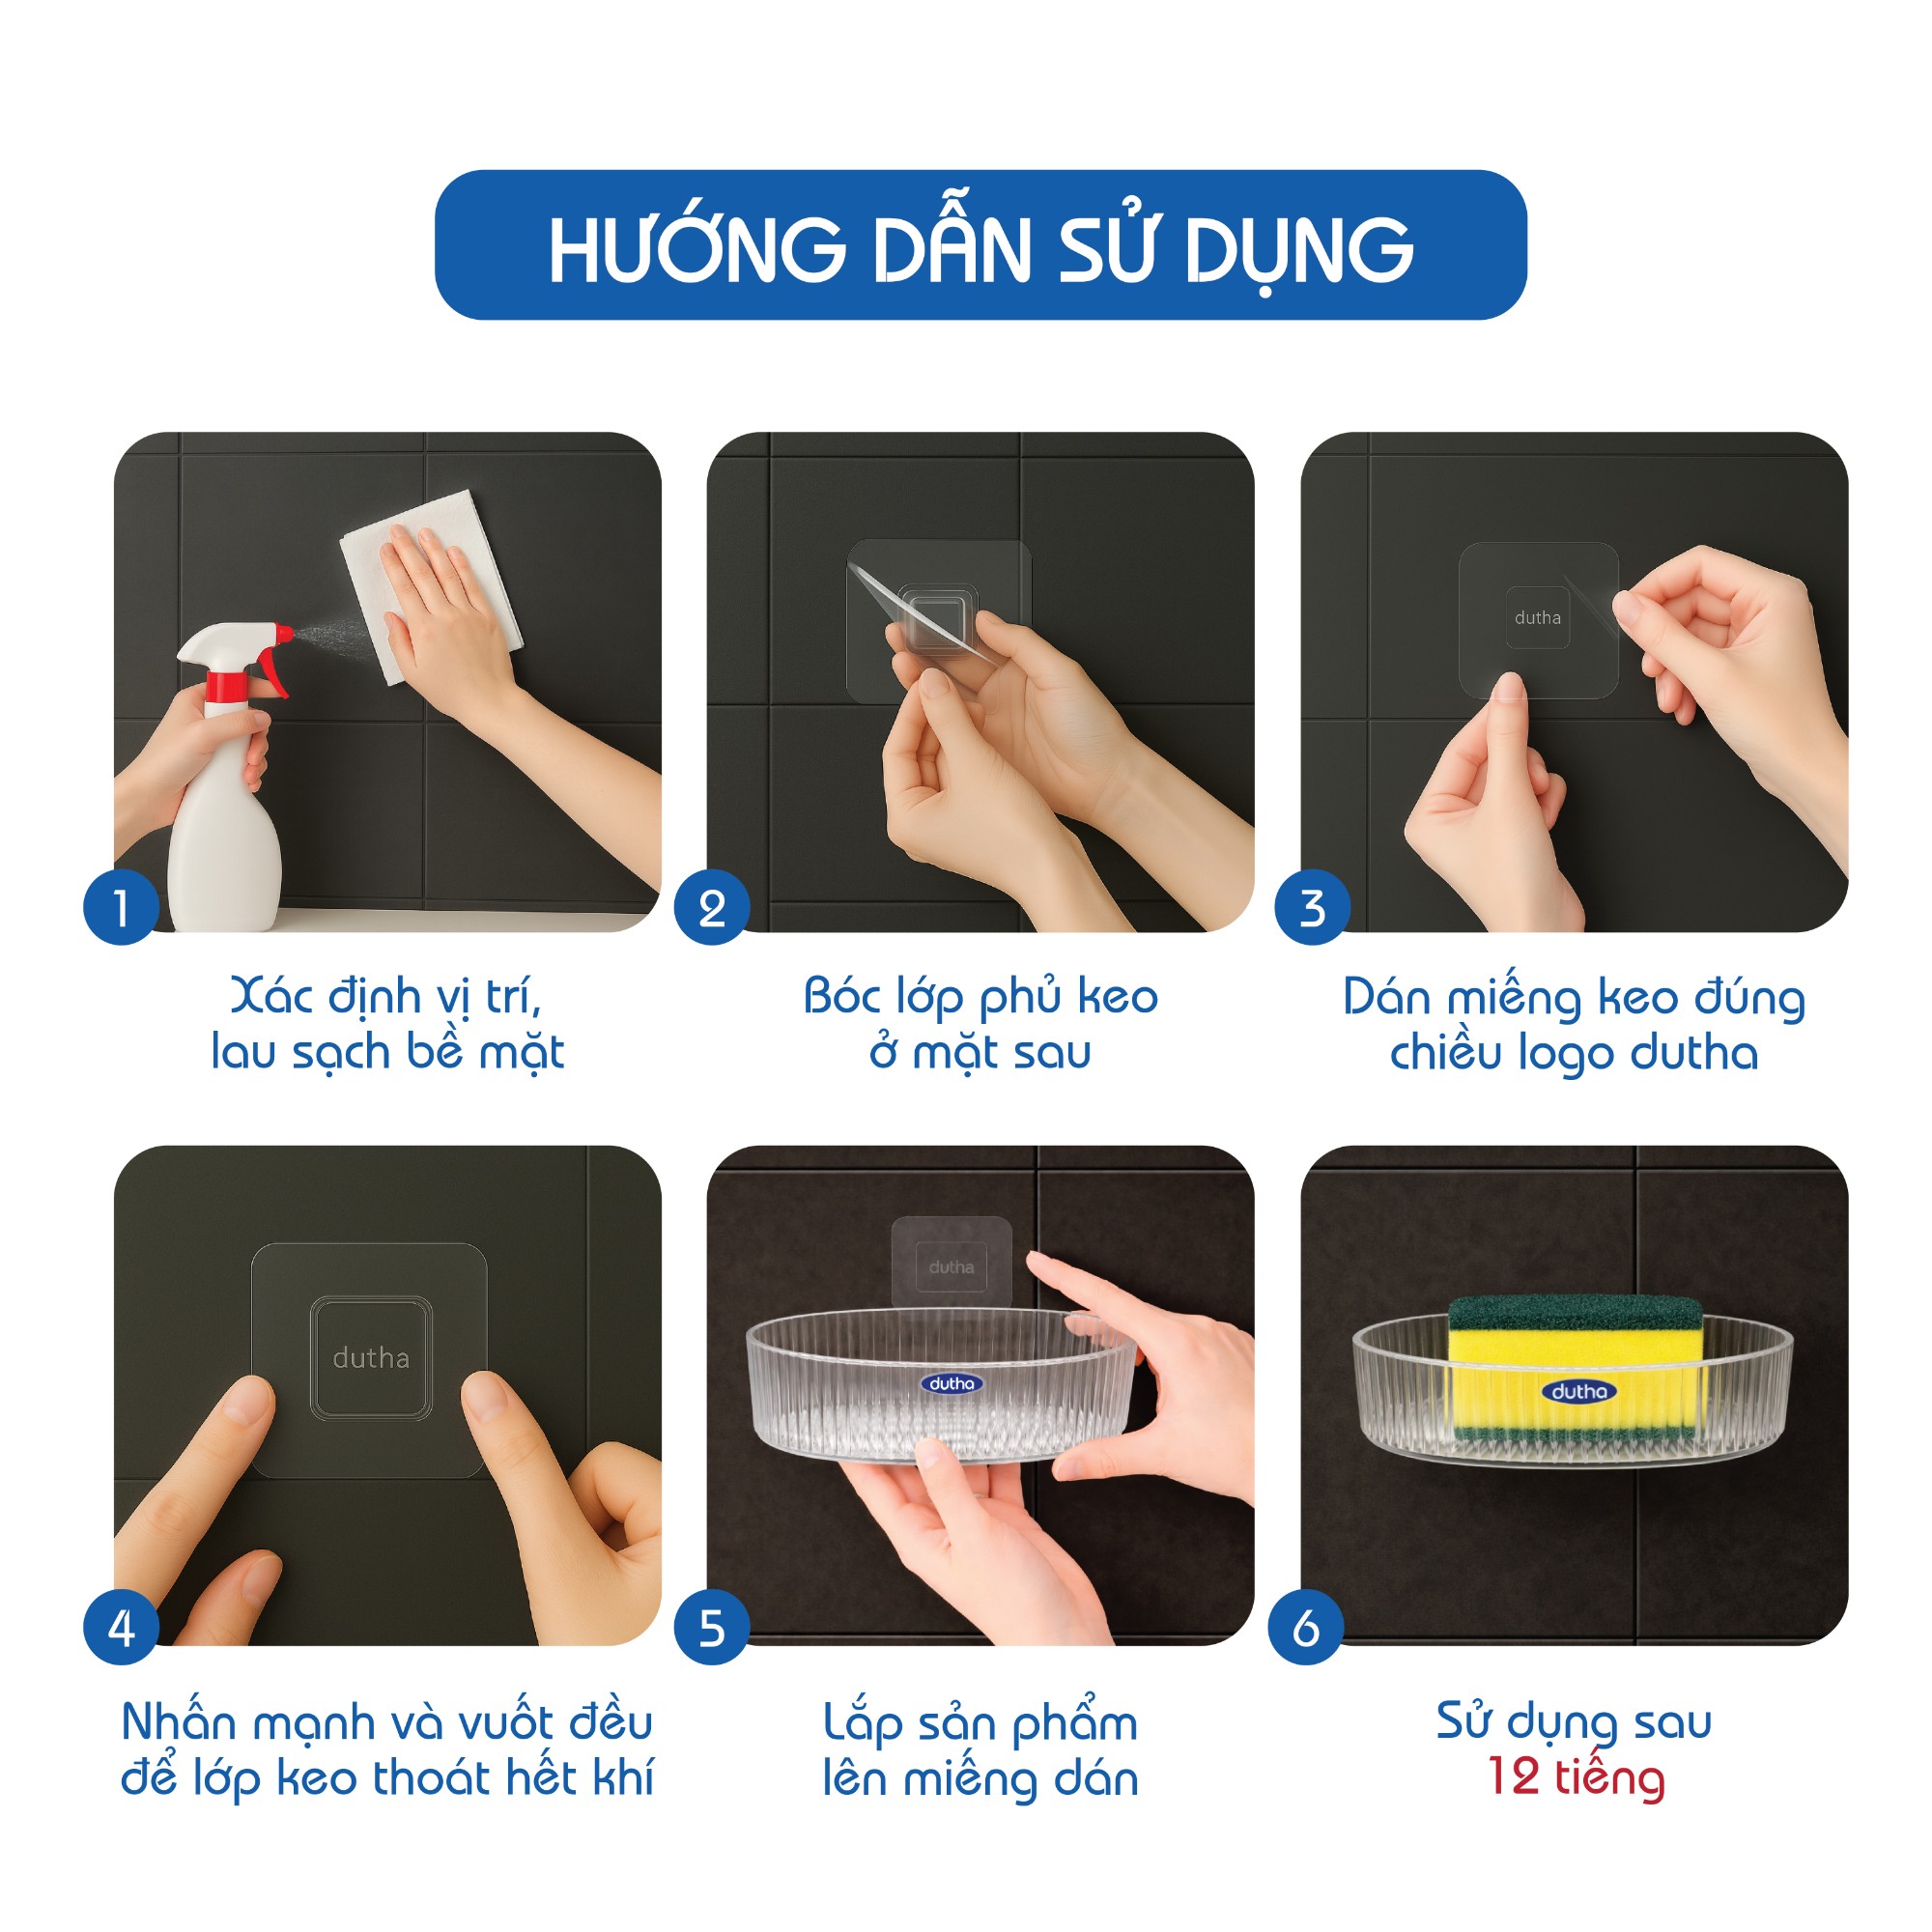
INSTRUCTIONS FOR USE:
Step 1: Locate and clean the surface.
Step 2: Peel off the adhesive backing.
Step 3: Apply the adhesive strip correctly, aligning the Dutha logo.
Step 4: Press firmly and smooth evenly to remove any air bubbles from the adhesive.
Step 5: Attach the product to the adhesive strip.
Step 6: Use after 12 hours.
(Note: Wait exactly 12 hours for the adhesive to bond properly.)
Note the surfaces the product adheres to: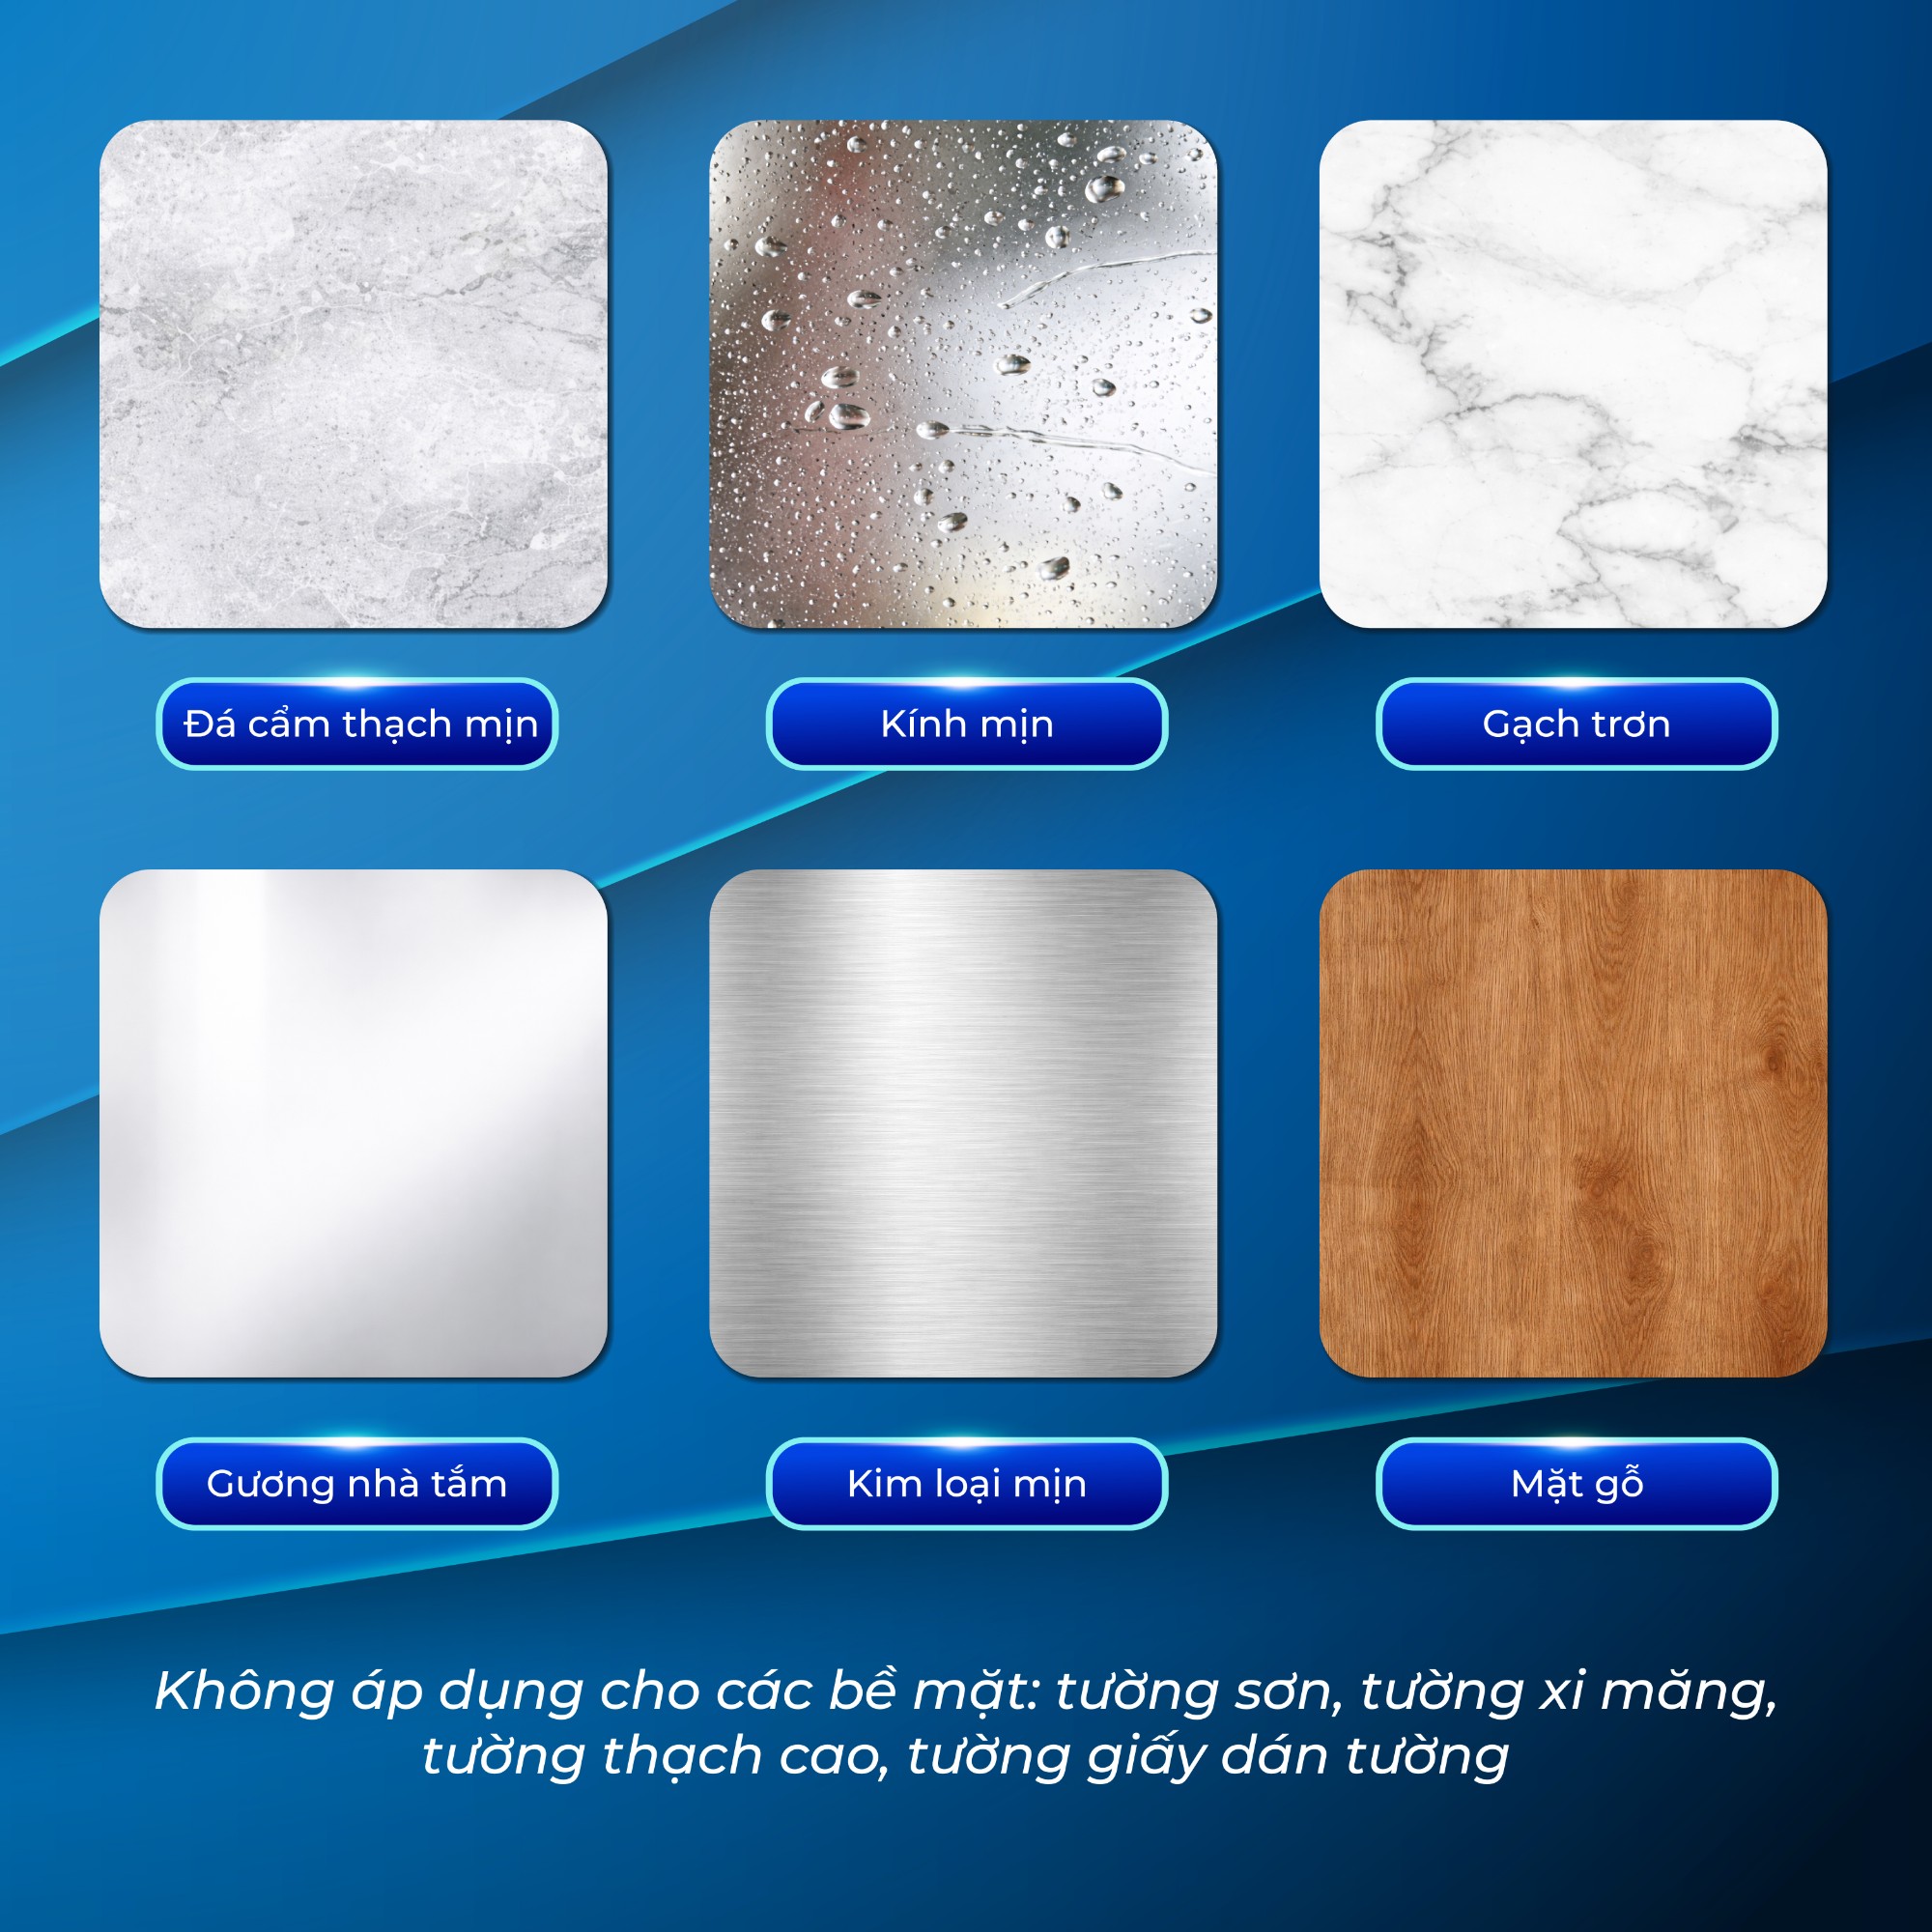
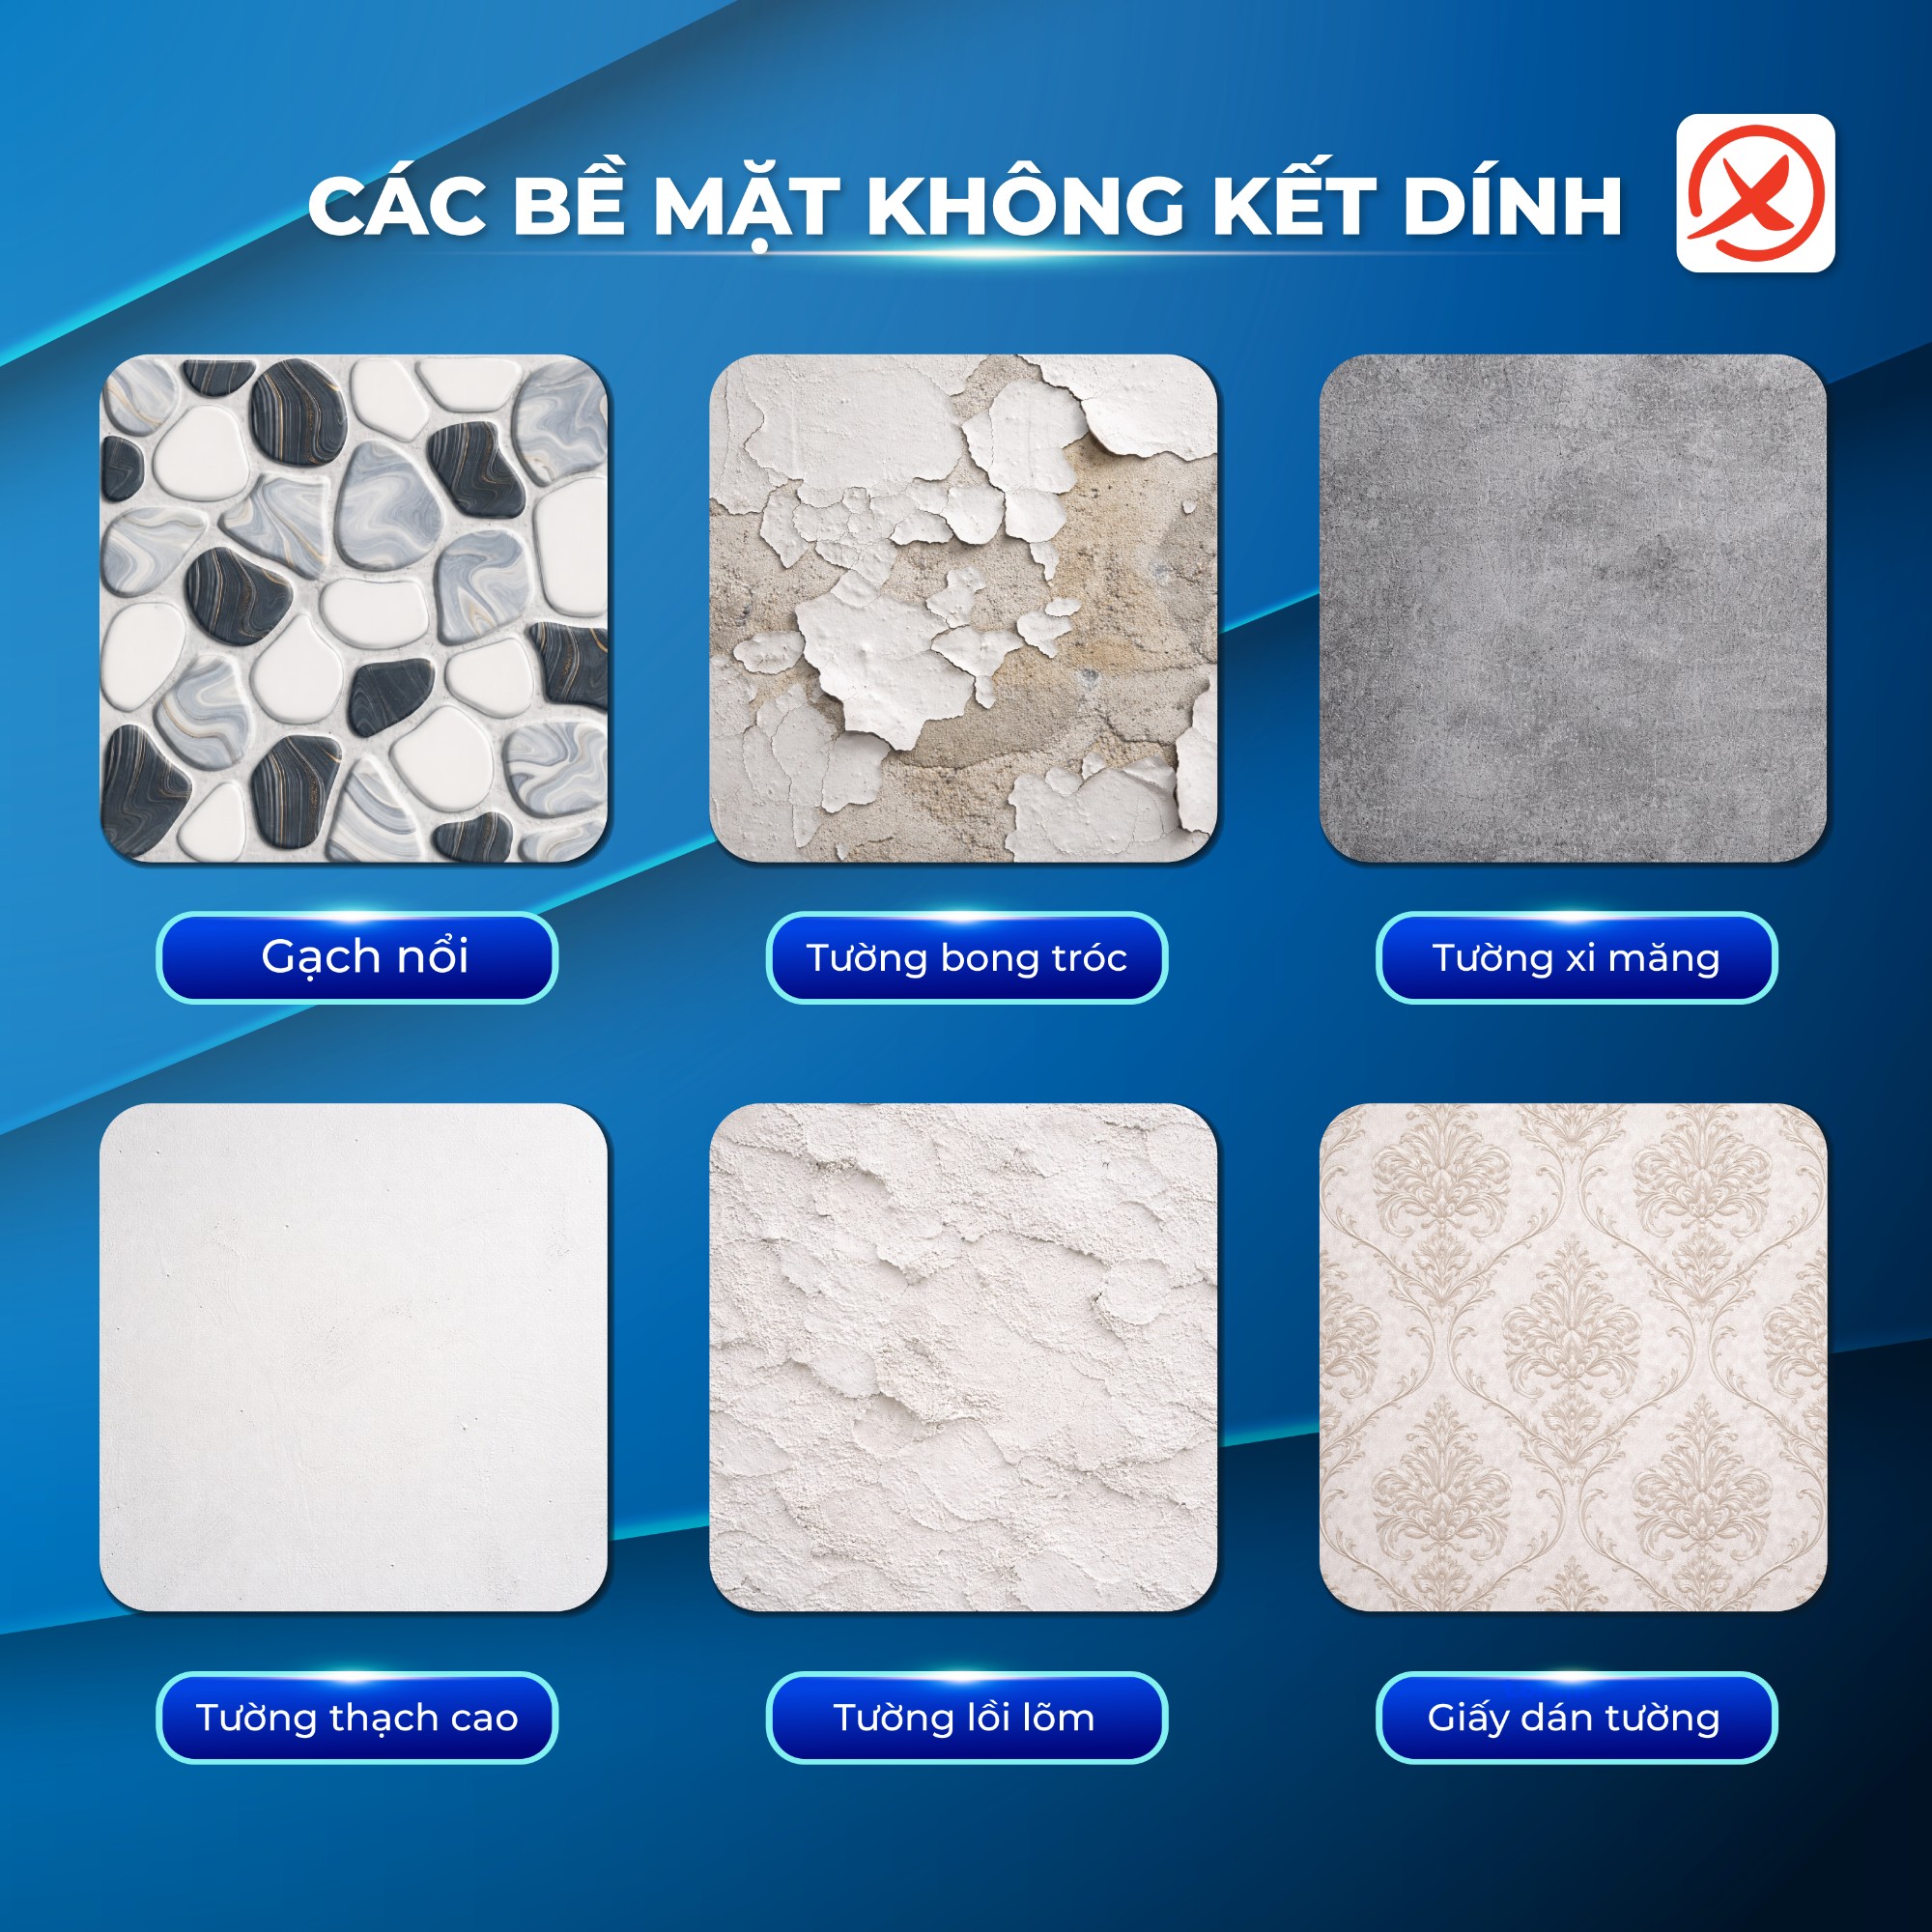
Note the non-stick surfaces of the product:


Other news

DUC THANH MANUFACTURING TRADING CO., LTD – DUTHACO
- 82 Street No. 24, Binh Phu Ward, Ho Chi Minh City, Vietnam
- Phone: 093 3939 740
- Email: hongchanthanh@duthaco.com